Custom Domains Feature
Starting from v1.18 Quick Code supports URL shortning and custom domains.
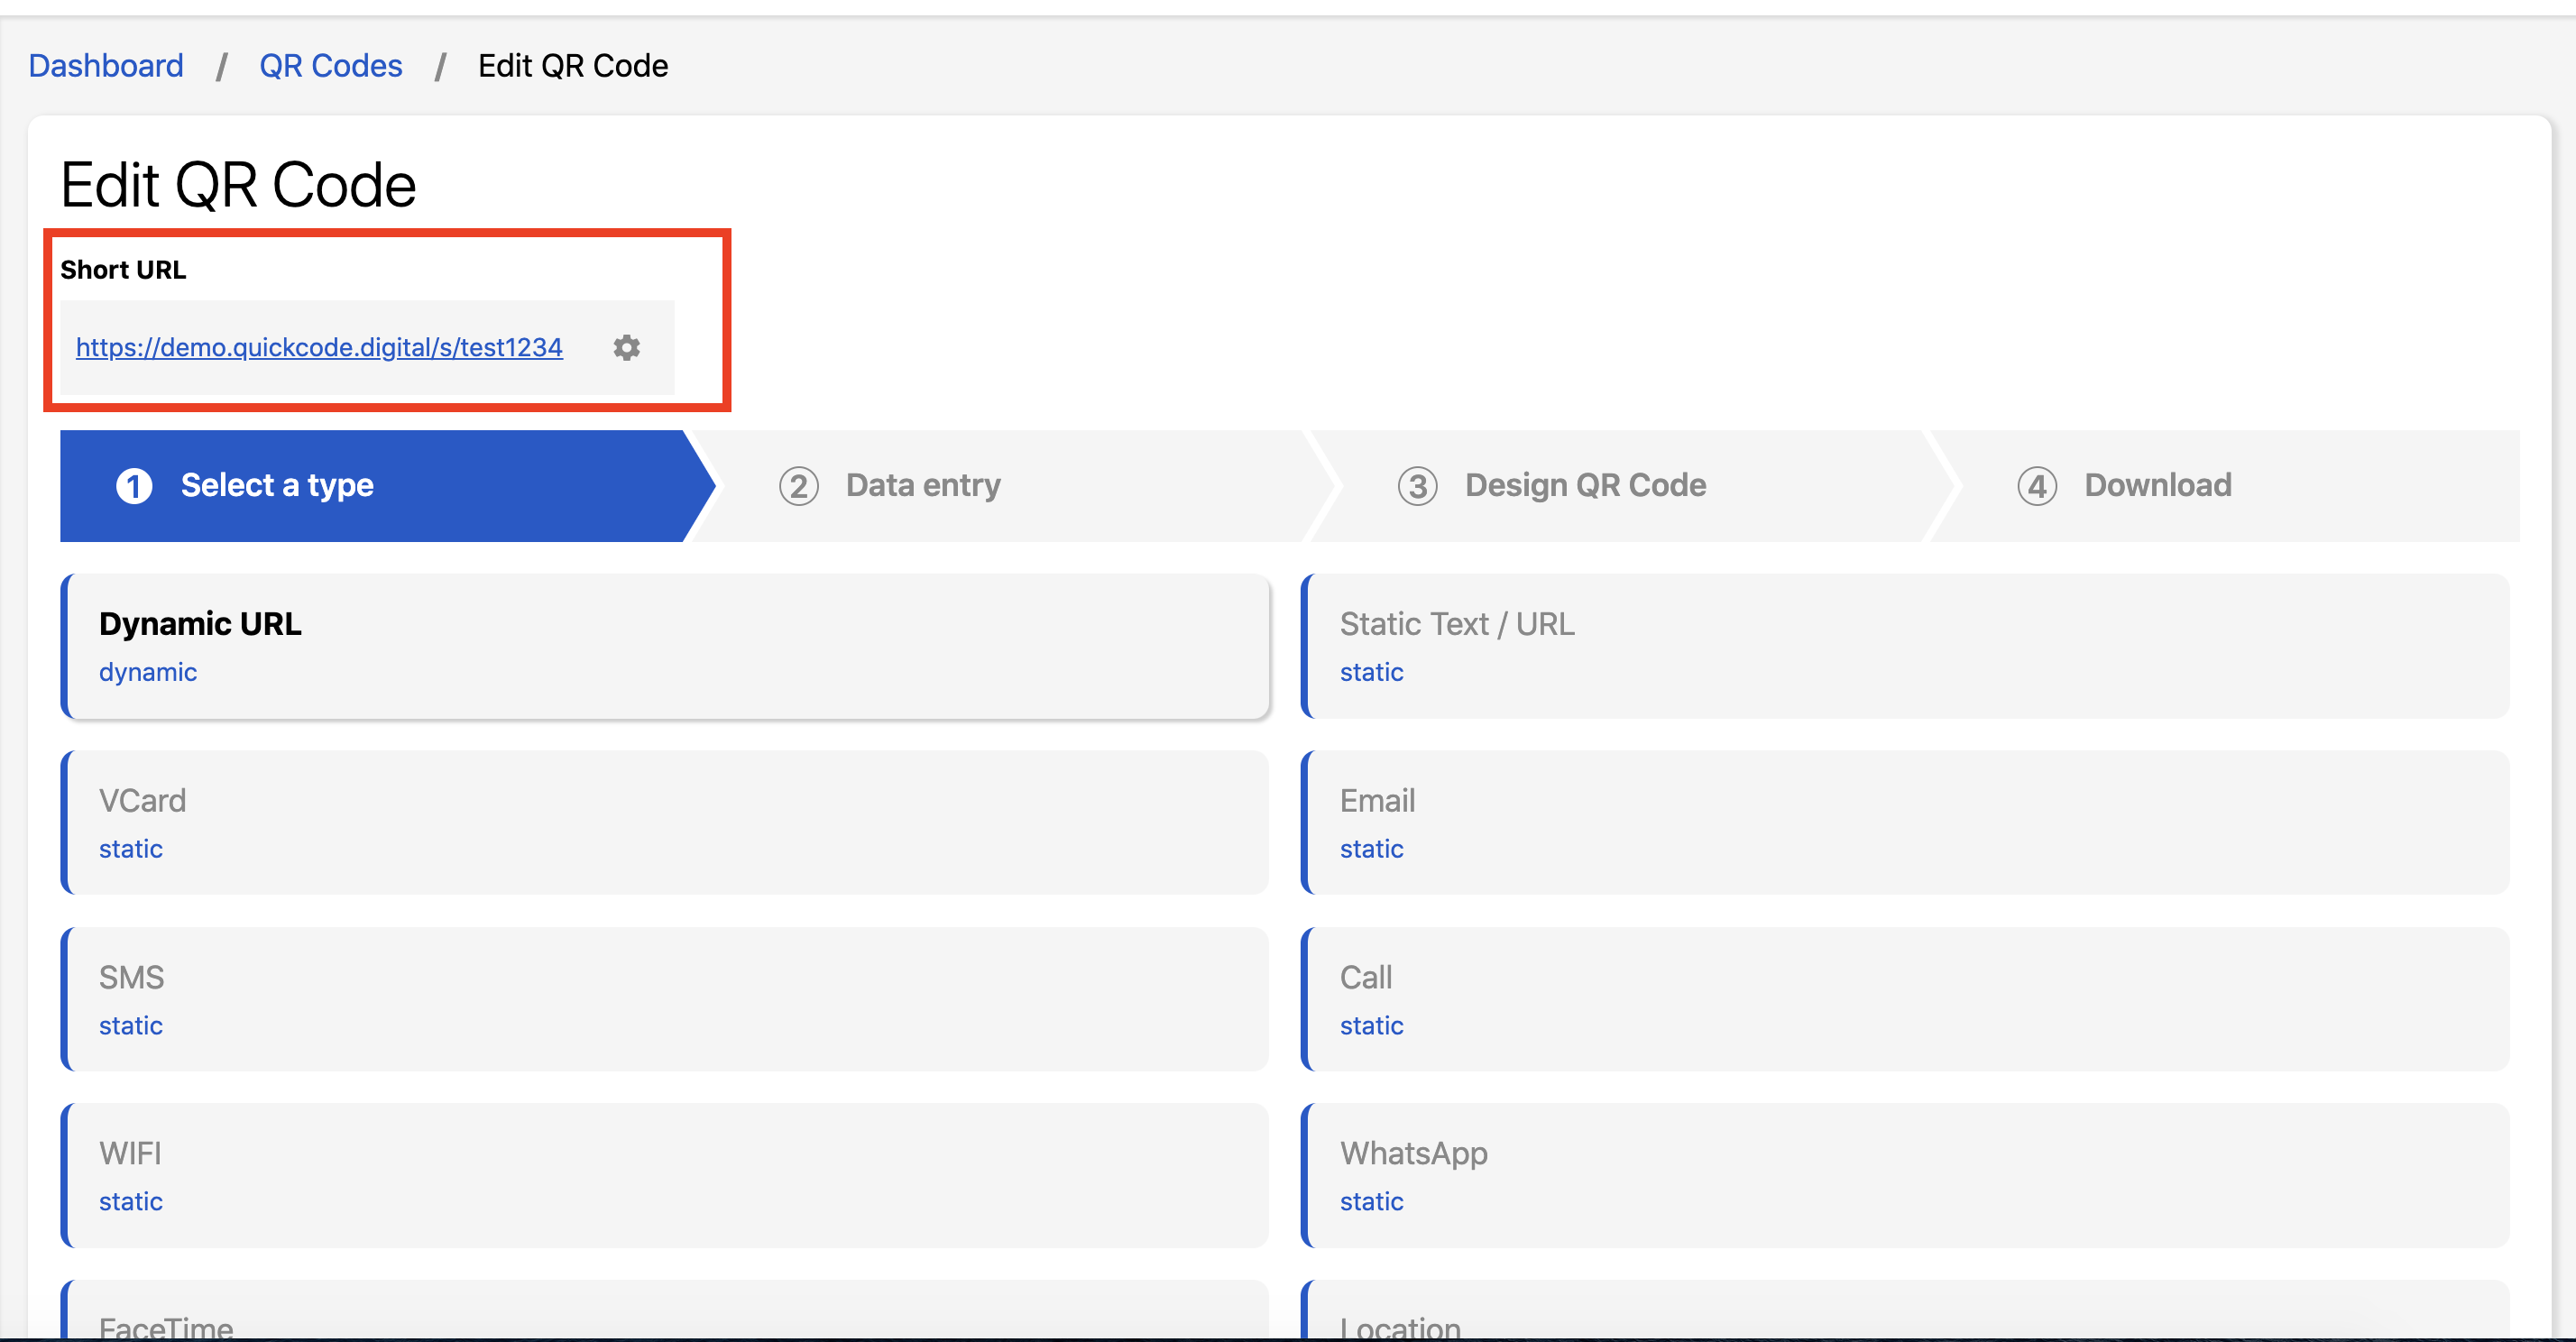
While creating a dynamic QR code, a short URL input will be available above the QR code form.
Add new domains for all users
Site owner should add short URLs to be available for all users. And here are the steps.
- Login as an admin and then go to System > Domains (from the sidebar menu).
- Click on Create and add your short domain, something like qr-cg.cc (that is just an example).
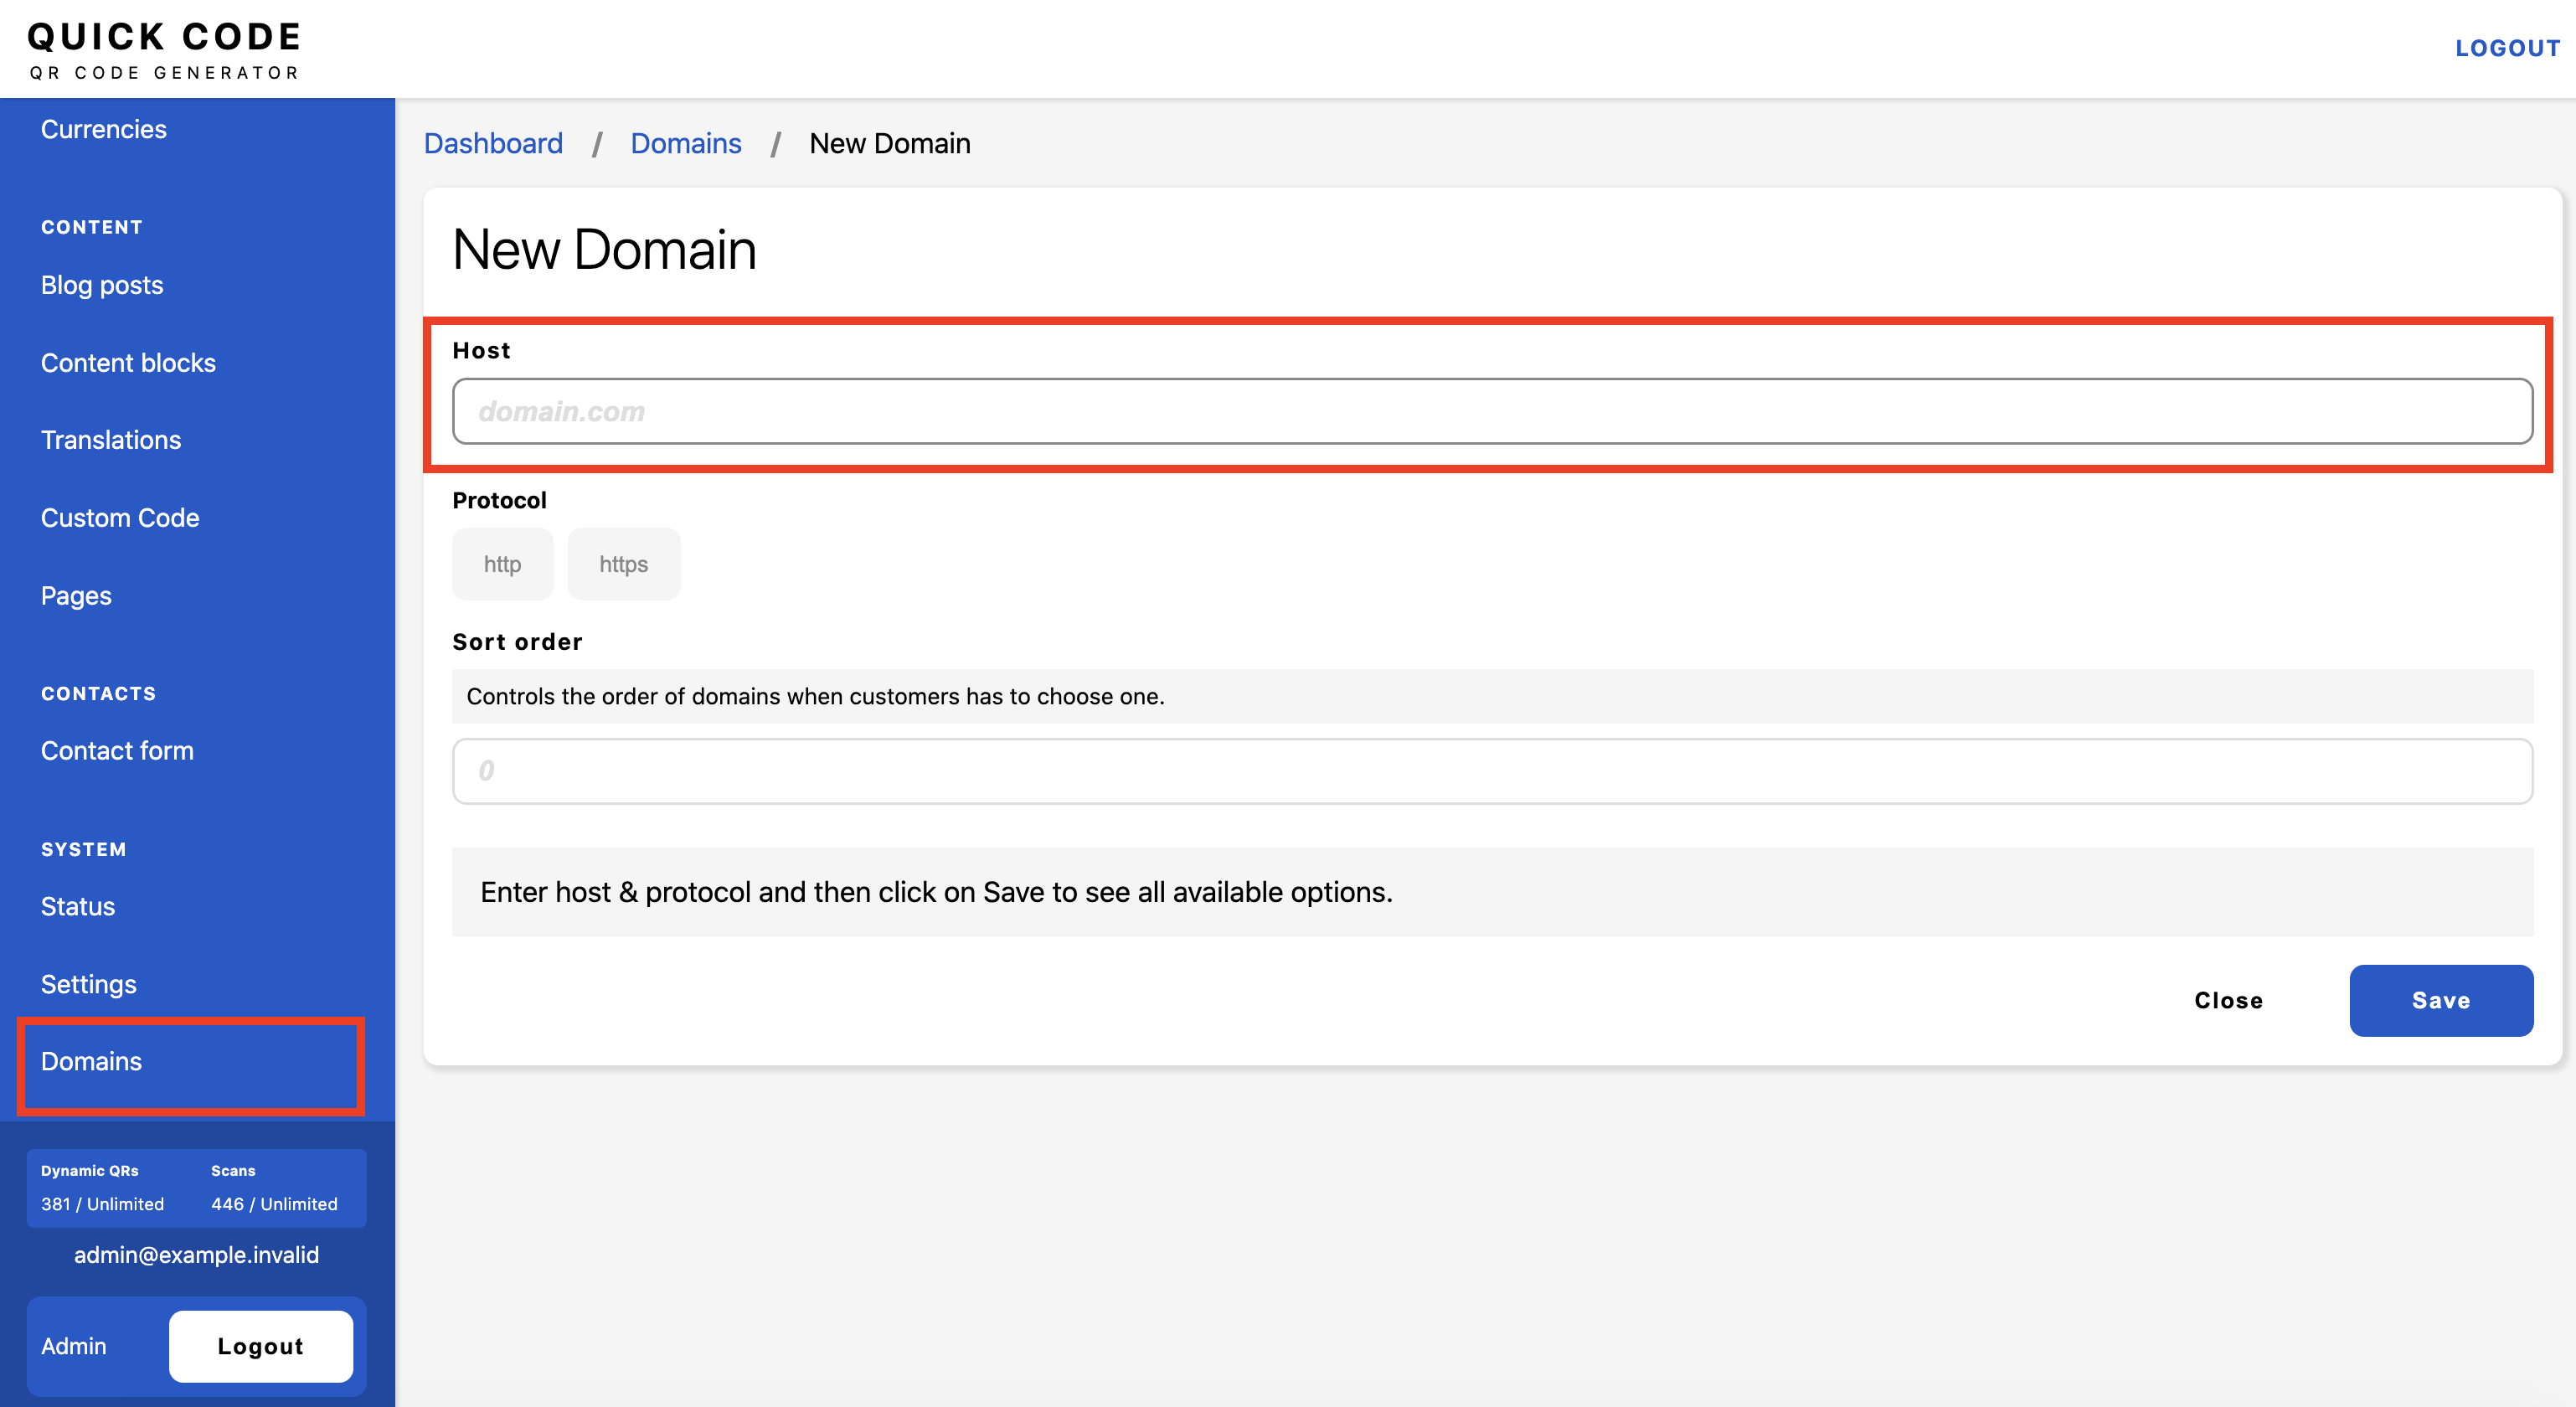
- Click on Save.
- You should have already bought that domain before starting the process.
- Go to your domain registrar control panel and add a CNAME as advised on the create domain form.
- Once you added the CNAME record, go back to the domain form and refresh the connectivity widget.
- If the CNAME is connected, then you will see a message that says Application is not accessible. Go to your control panel and add the domain as an addon domain so the app would be accessible using the newly added domain.

Help
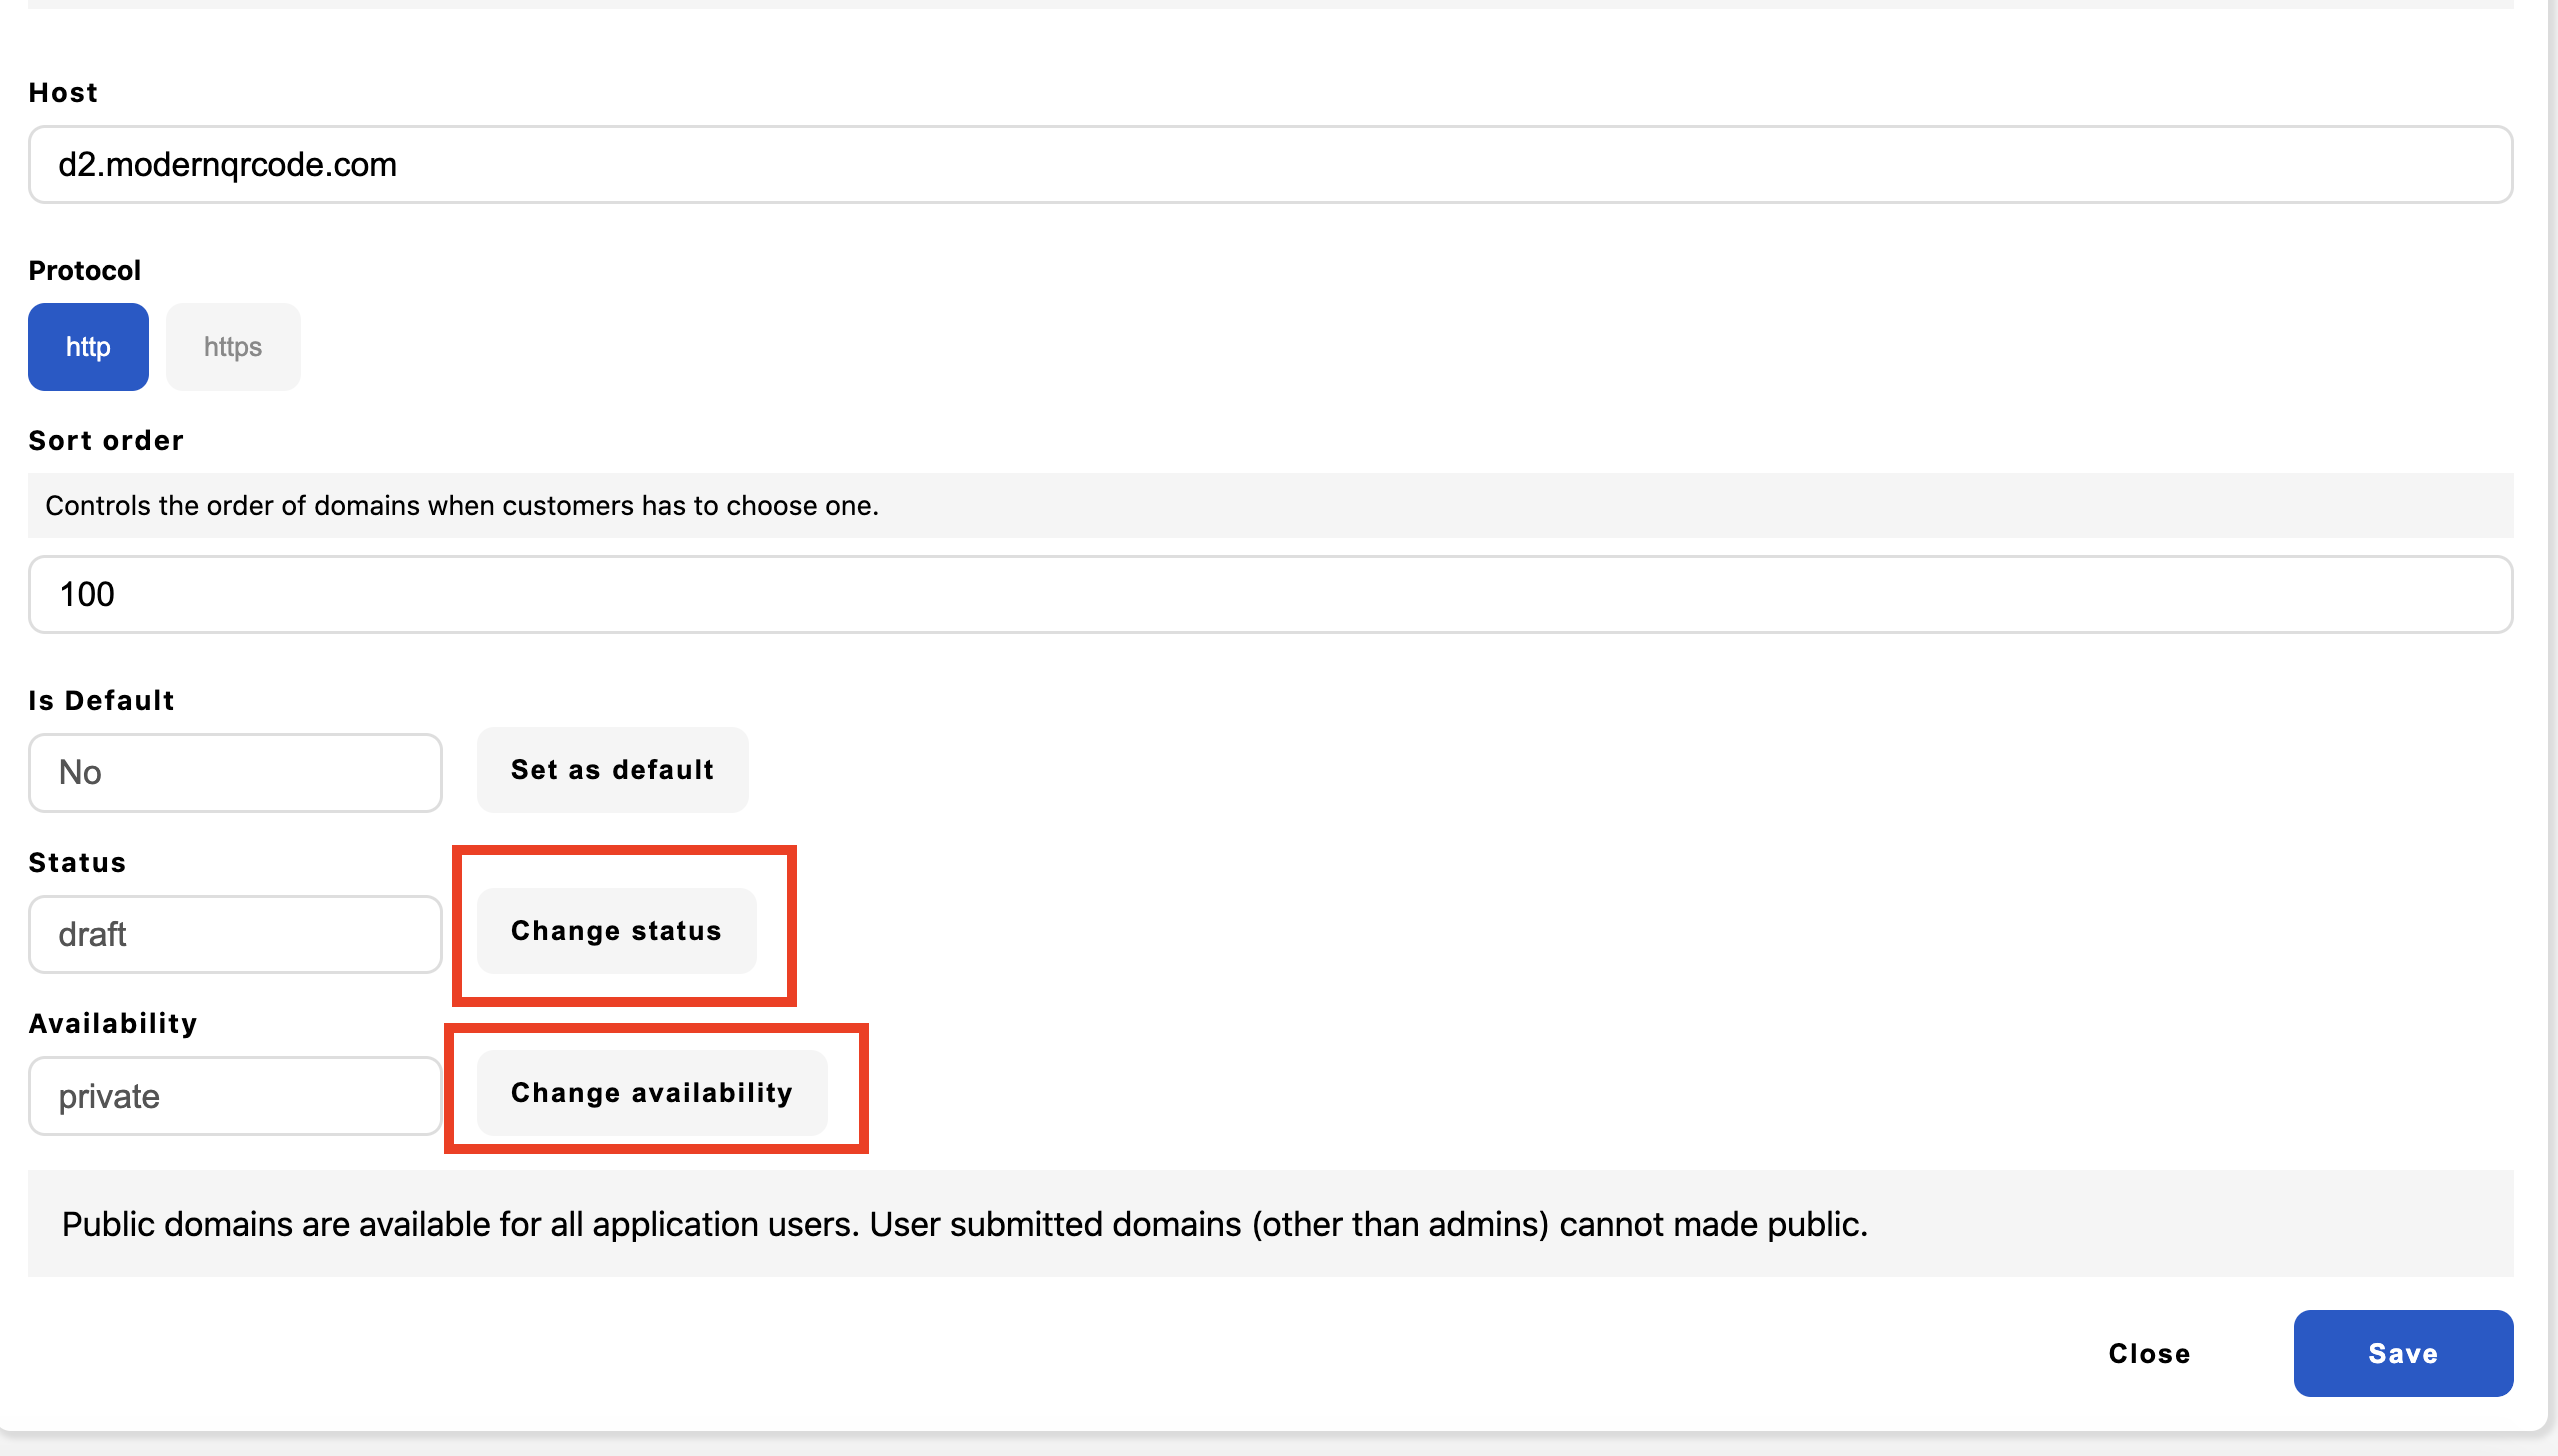
If SSL certificate is not installed on your newly added subdomain, then make sure to select http in the protocol field instead of https
- Click on Change Status button in Domain form and change status to Published.
- Click on Change Availability button in domain form and change availability to Public.
- Now all users should be able to use your newly added domain.
Add a customer domain
Customers can add their own domains by the following steps.
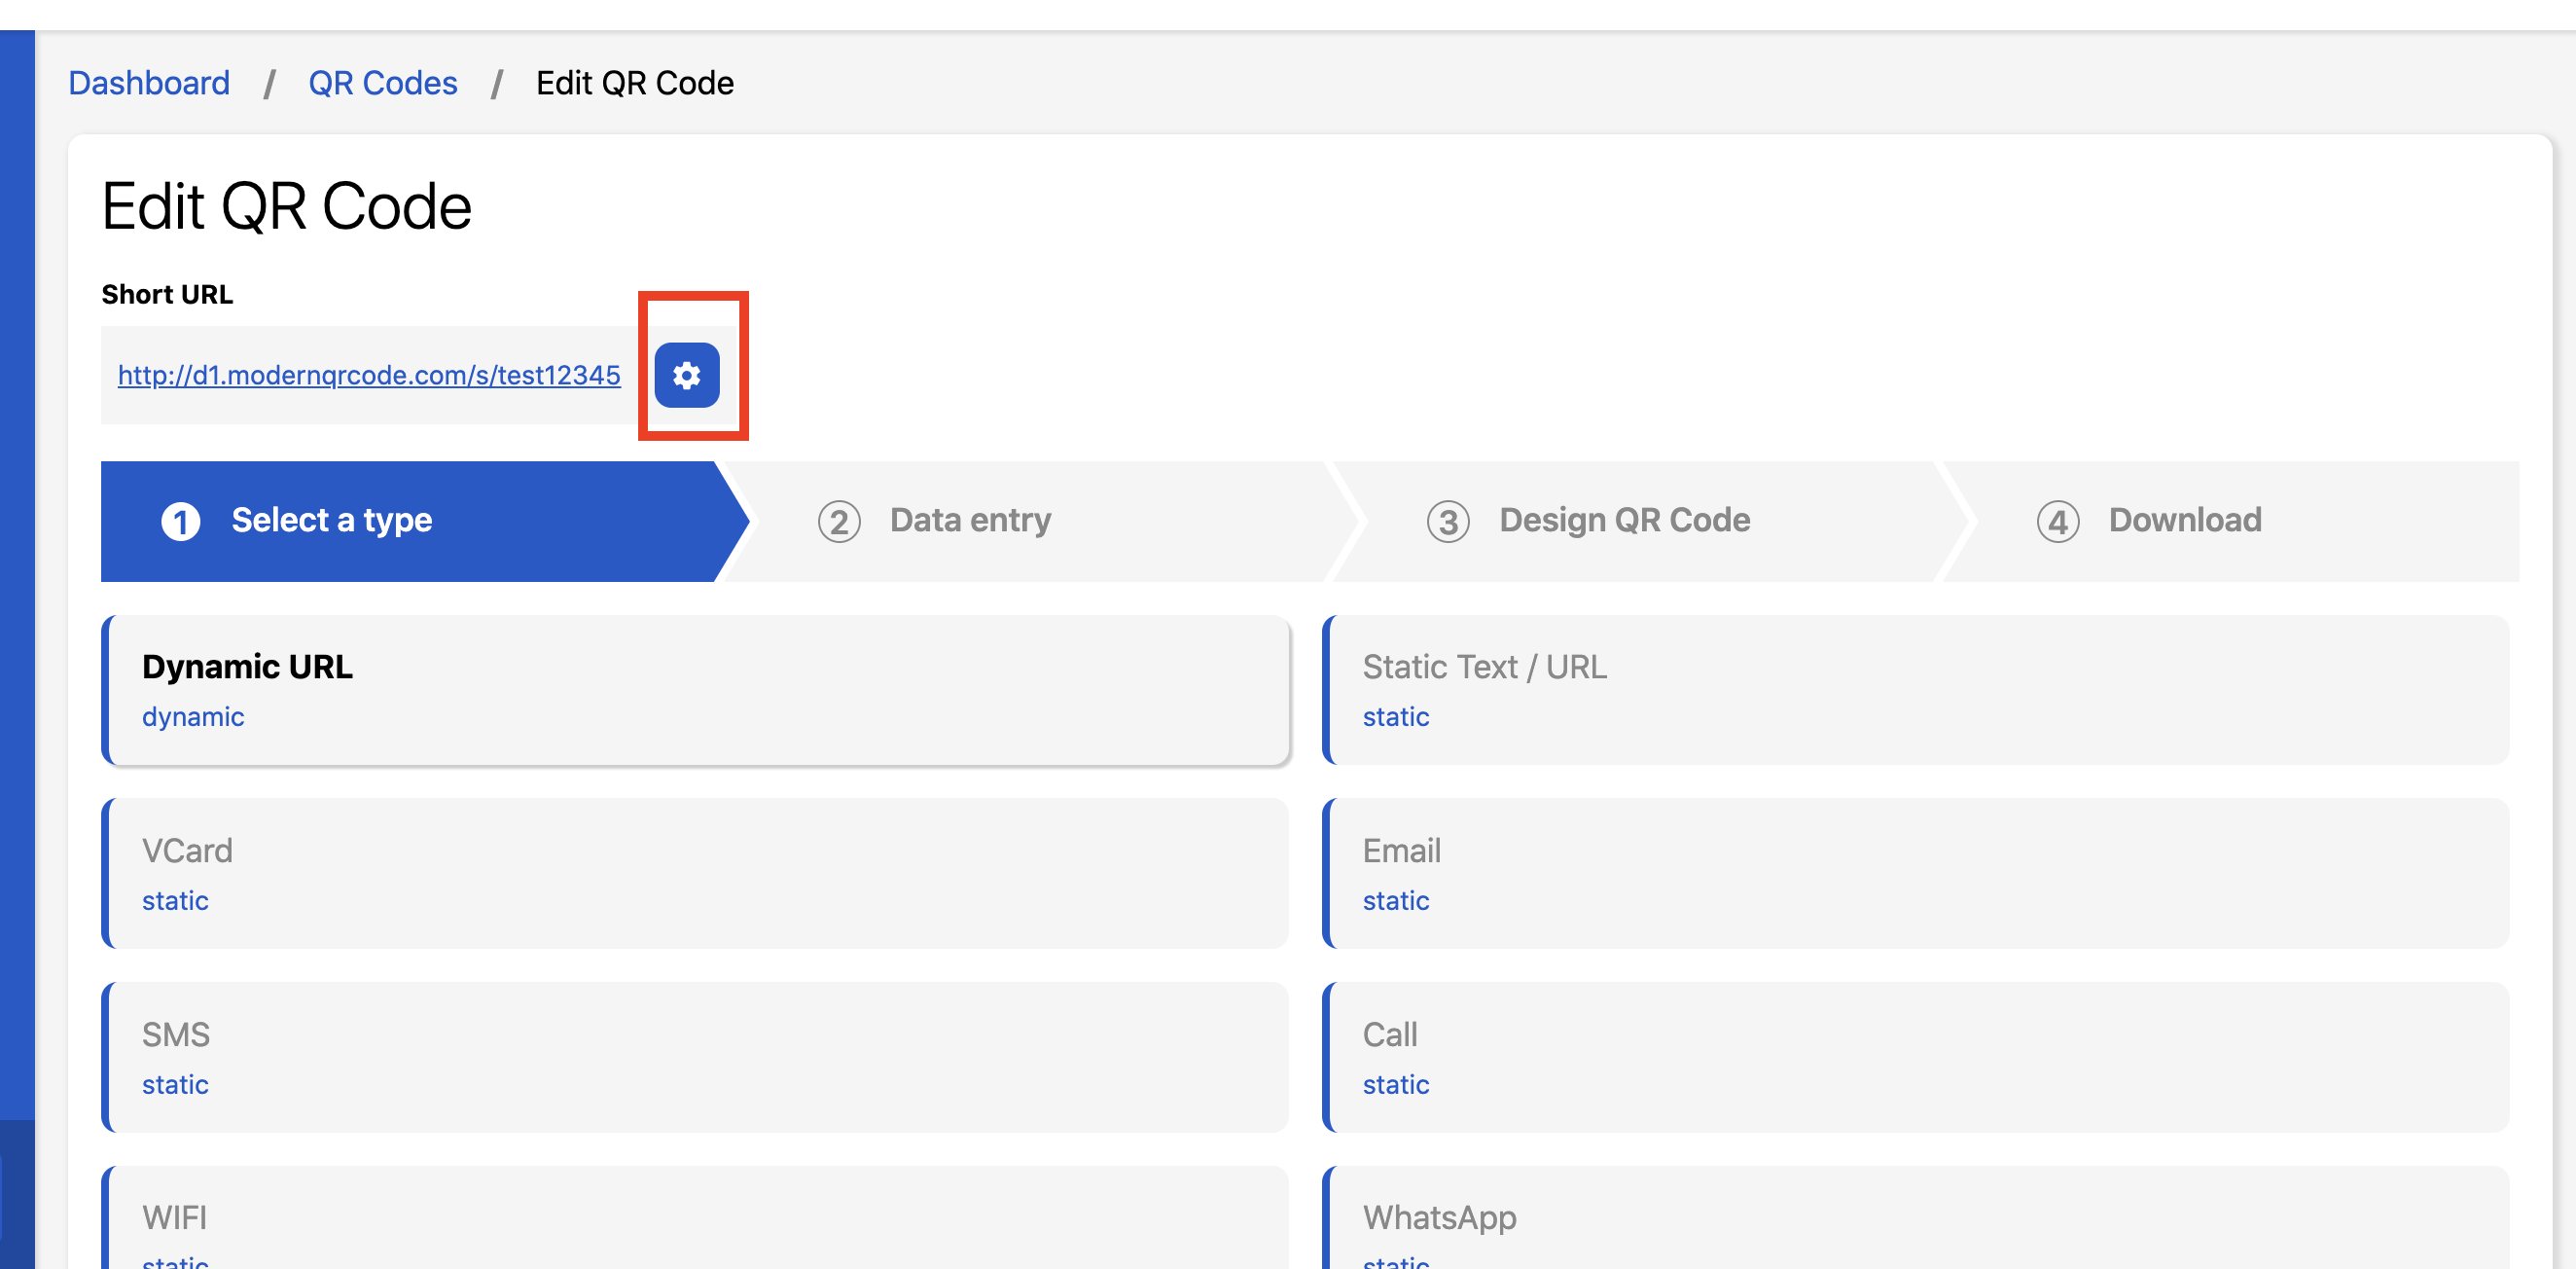
-
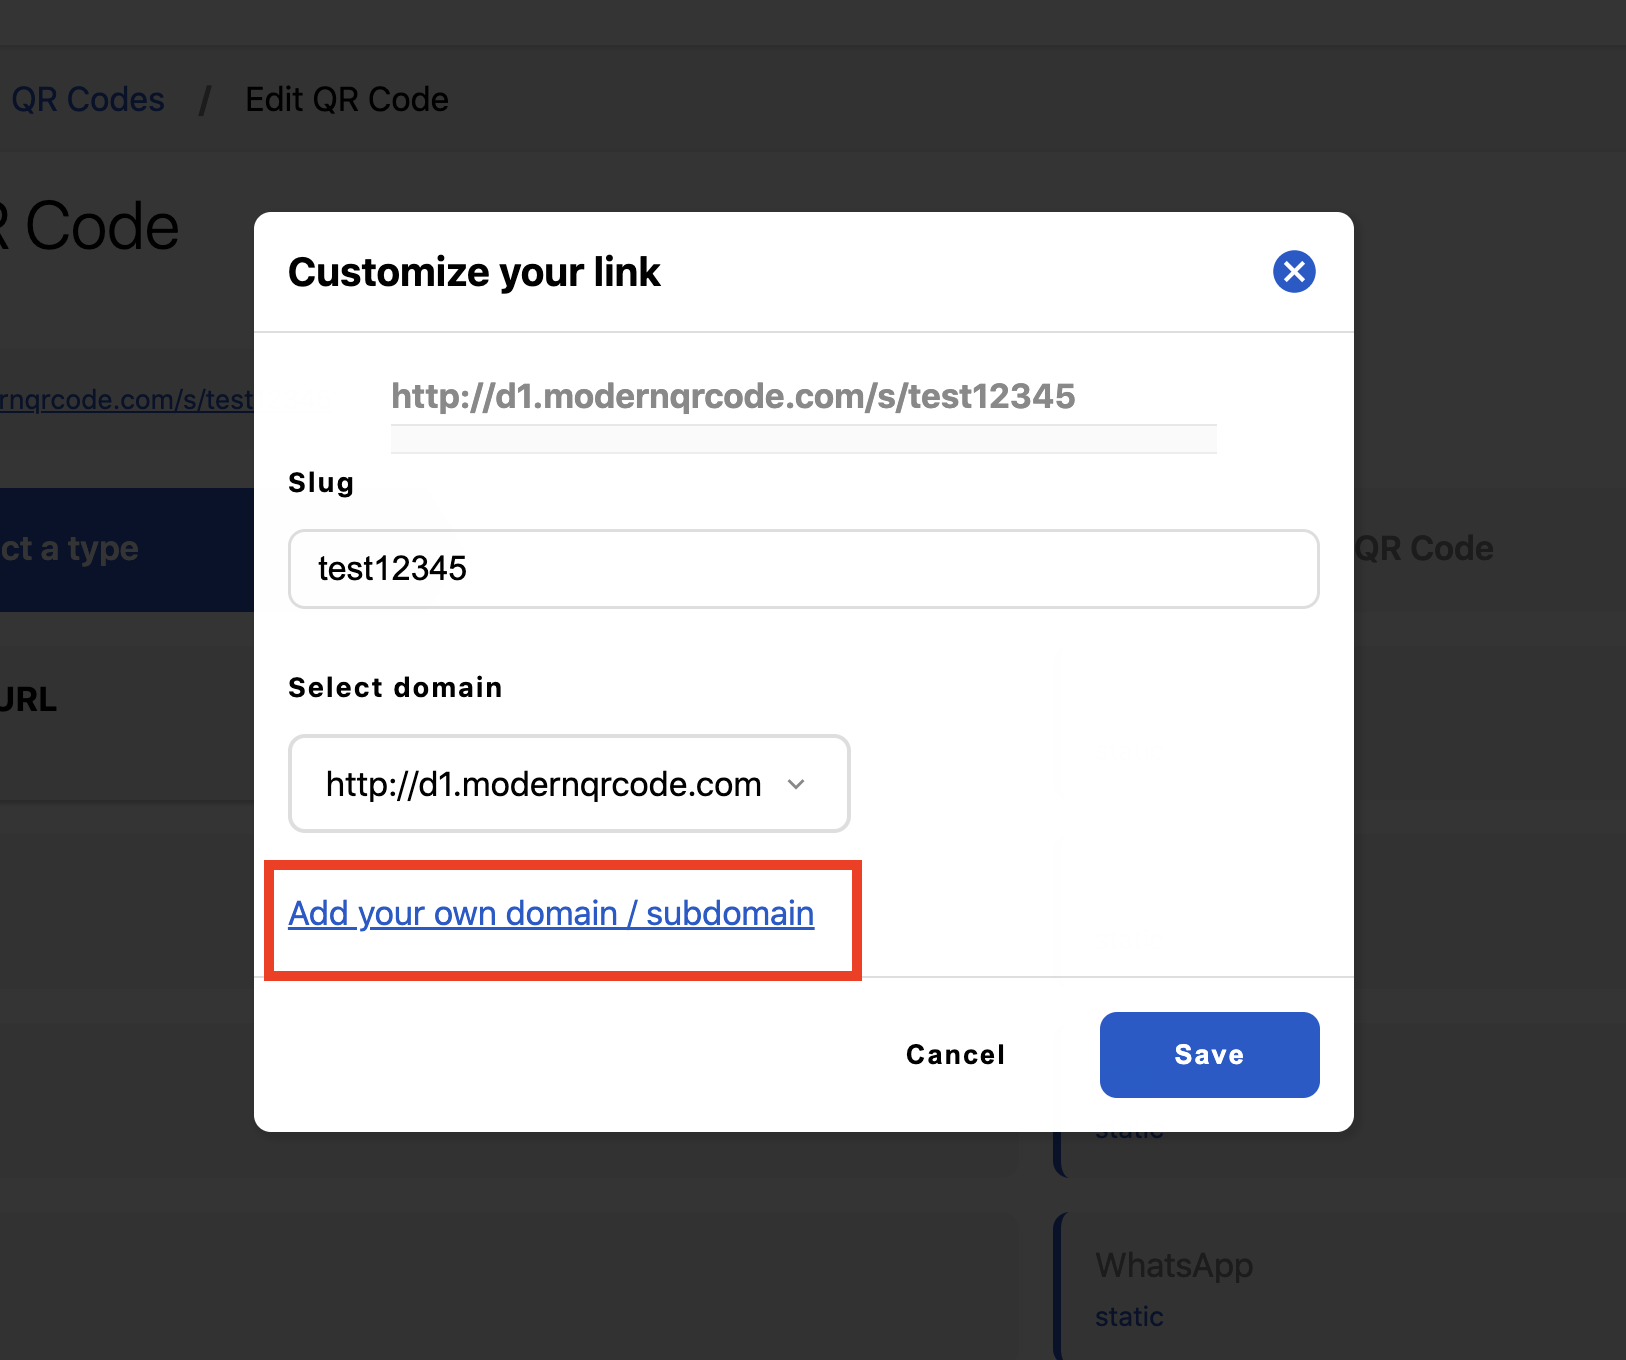
Click on the cog icon in short URL input.
-
Click on add your domain / subdomain link.
-
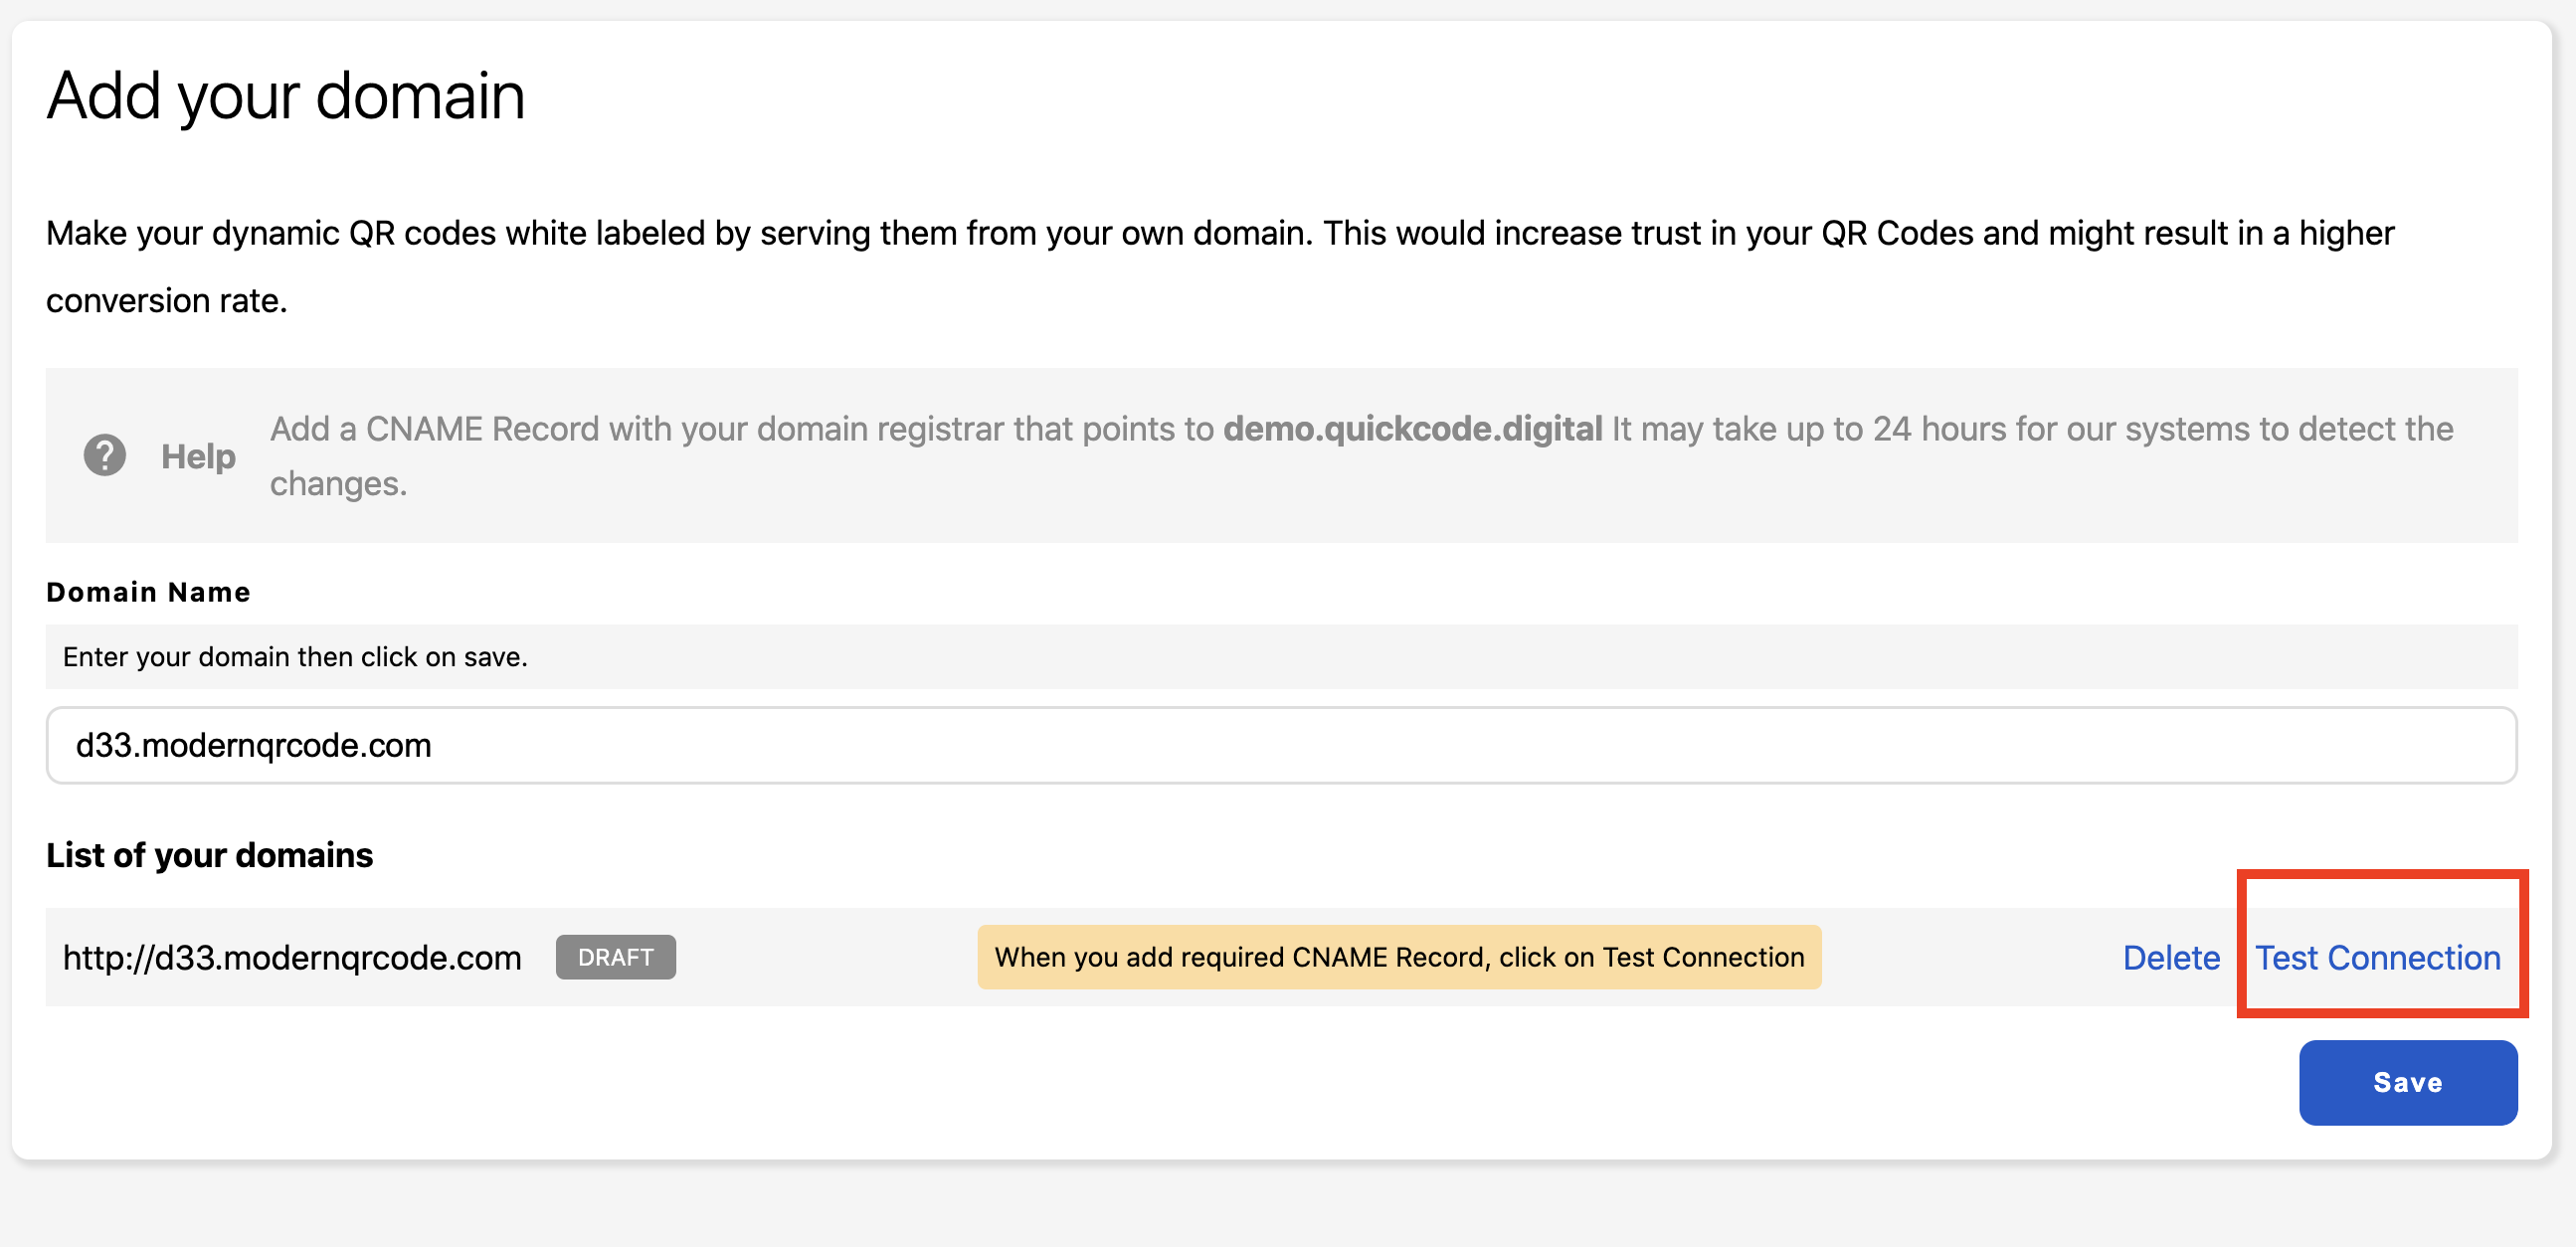
In add your domain page, customers should add their domain and then click on save.

-
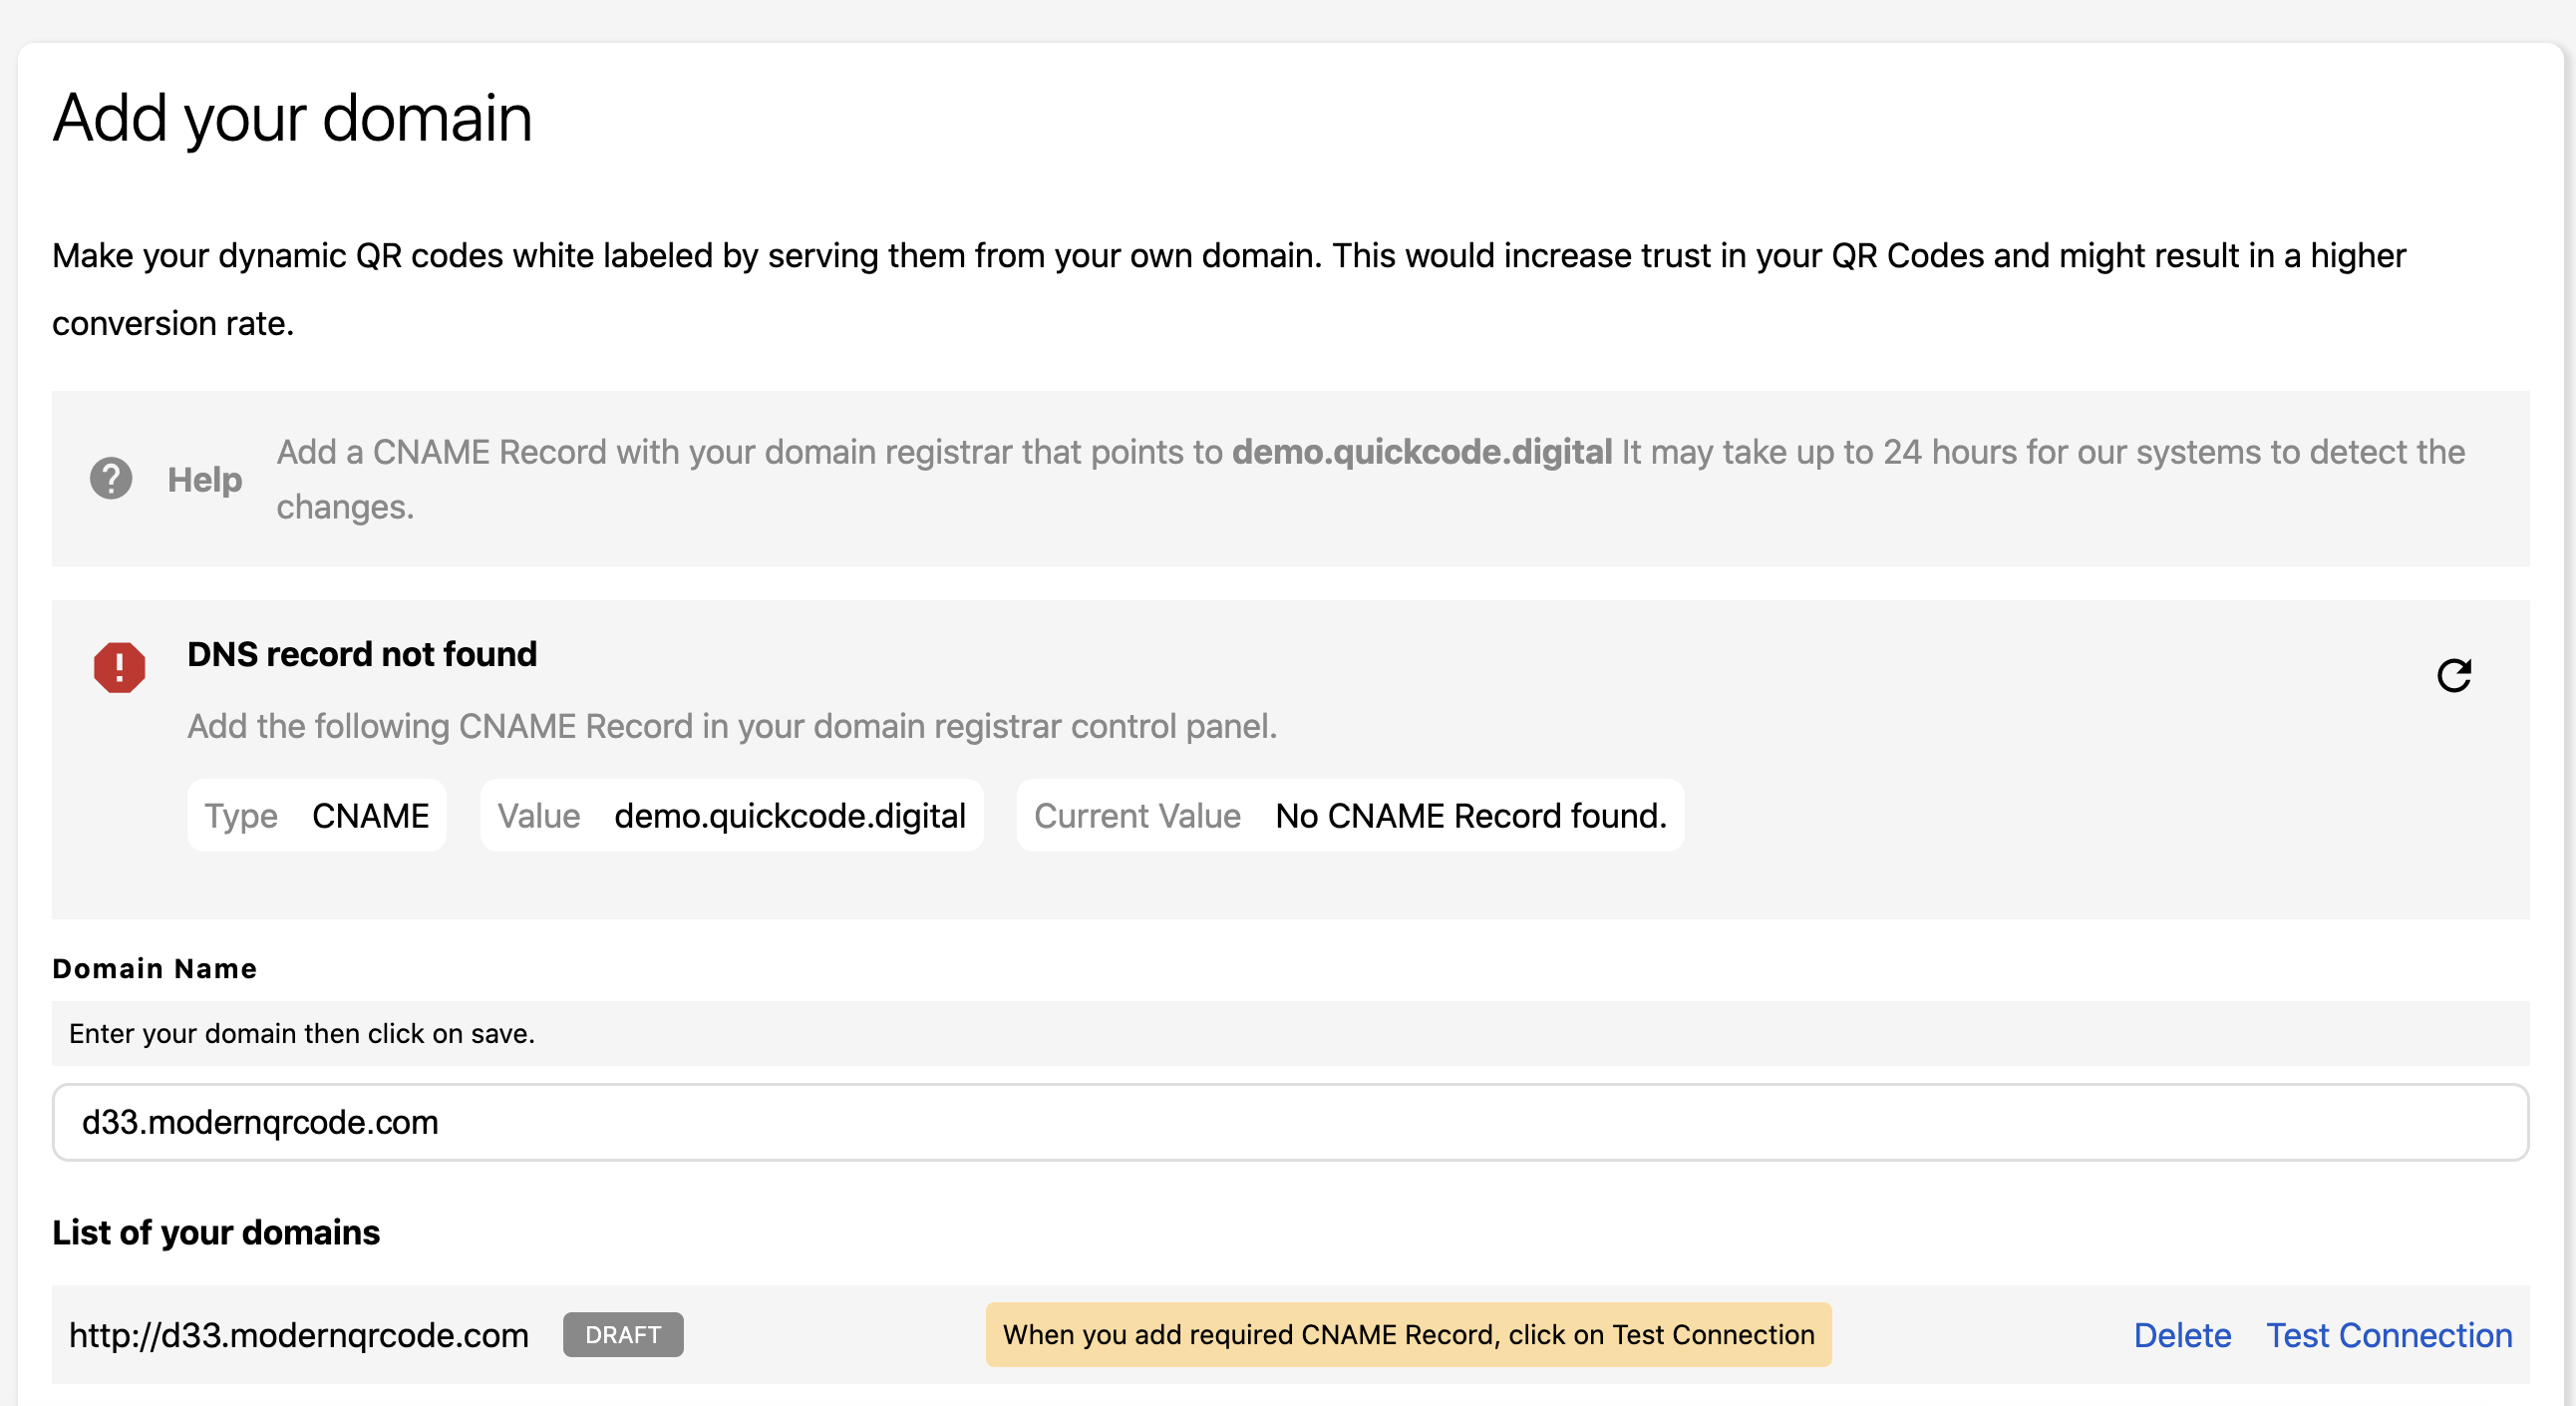
CNAME records should be added, and after that, he should click on Test Connection link next to the newly added domain.
-
If the domain is not connect, an error message will be shown.
-
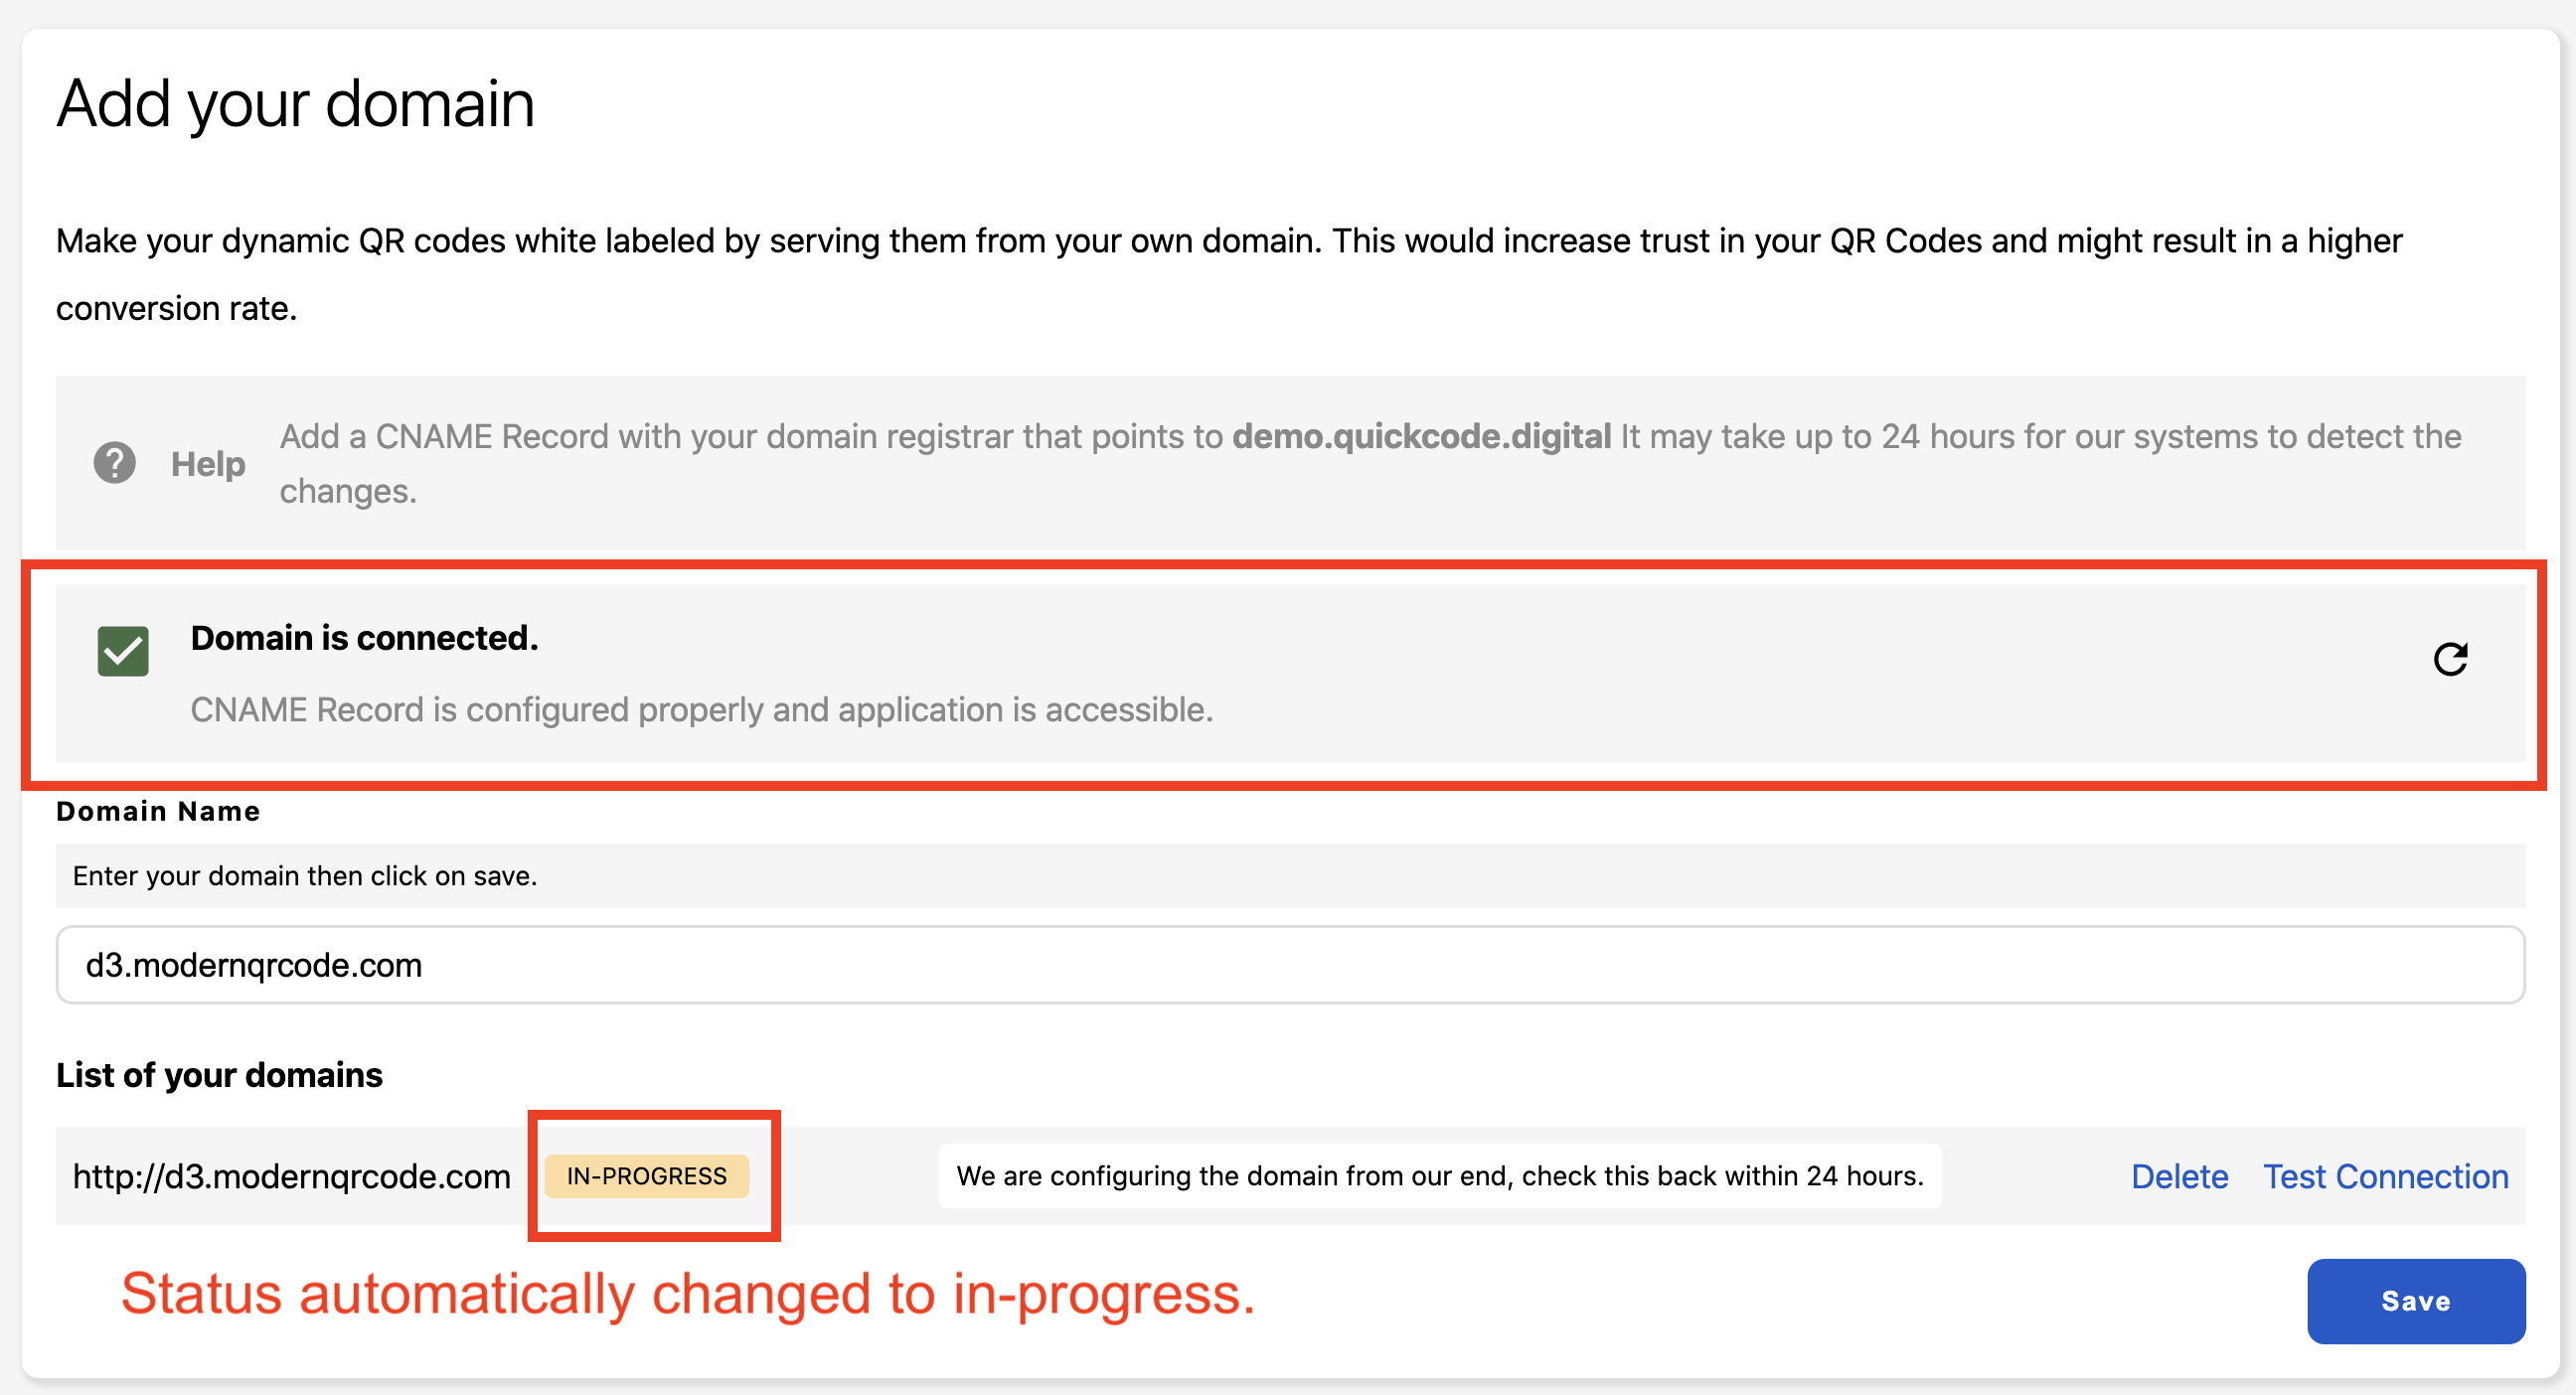
When domain is connected, the domain status will change automatically to IN-PROGRESS and the site admin will be notified by email.
Domain publishing
Site administrator will be notified when there is a new submitted domain, he should add required server confugration and then he should change the domain status to Published.
Custom Domain Proxying
In some cases, it's not possible to point the new custom domain to your domain, for example, in cPanel server, if the main domain and the new domain are hosted on different accounts on the same server/cluster cPanel won't allow you to add the new subdomain in that case.
We have come up with a workaround to fix this, you will need to set up php proxy on the customer subdomain:
Step 1: Create a subdomain and add the following files in its root directory:
index.php
<?php
// Define the destination URL
define('DESTINATION', 'https://your-domain.tld');

// Initialize a new cURL session
$ch = curl_init();

// Initialize an empty array to store response headers
$headers = [];

// Function to capture response headers
function get_response_headers($curl, $header_line) {
    global $headers;
    $headers[] = $header_line;
    return strlen($header_line);
}

function get_ip() {
    $ipaddress = '';
    if (isset($_SERVER['HTTP_CLIENT_IP']))
        $ipaddress = $_SERVER['HTTP_CLIENT_IP'];
    else if(isset($_SERVER['HTTP_X_FORWARDED_FOR']))
        $ipaddress = $_SERVER['HTTP_X_FORWARDED_FOR'];
    else if(isset($_SERVER['HTTP_X_FORWARDED']))
        $ipaddress = $_SERVER['HTTP_X_FORWARDED'];
    else if(isset($_SERVER['HTTP_X_CLUSTER_CLIENT_IP']))
        $ipaddress = $_SERVER['HTTP_X_CLUSTER_CLIENT_IP'];
    else if(isset($_SERVER['HTTP_FORWARDED_FOR']))
        $ipaddress = $_SERVER['HTTP_FORWARDED_FOR'];
    else if(isset($_SERVER['HTTP_FORWARDED']))
        $ipaddress = $_SERVER['HTTP_FORWARDED'];
    else if(isset($_SERVER['REMOTE_ADDR']))
        $ipaddress = $_SERVER['REMOTE_ADDR'];
    else
        $ipaddress = 'UNKNOWN';
    return $ipaddress;
}

// Function to get User-Agent headers from the client's request
function get_user_agent_headers() {
    $userAgent = isset($_SERVER["HTTP_USER_AGENT"]) ? $_SERVER["HTTP_USER_AGENT"] : 'Unknown';
    return [
        'User-Agent: ' . $userAgent,
        'X-Forwarded-Host: ' .  $_SERVER['SERVER_NAME'],
        'X-Forwarded-For: ' . get_ip(),
    ];
}

// Set cURL options
curl_setopt($ch, CURLOPT_URL, DESTINATION . $_SERVER['REQUEST_URI']);
curl_setopt($ch, CURLOPT_HEADER, 0);
curl_setopt($ch, CURLOPT_RETURNTRANSFER, 1);
curl_setopt($ch, CURLOPT_HEADERFUNCTION, "get_response_headers");
curl_setopt($ch, CURLOPT_HTTPHEADER, get_user_agent_headers());
curl_setopt($ch, CURLOPT_ENCODING, '');
curl_setopt($ch, CURLOPT_FOLLOWLOCATION, 0);
curl_setopt($ch, CURLOPT_SSL_VERIFYHOST, 2); // Enable SNI
curl_setopt($ch, CURLOPT_SSL_VERIFYPEER, true); // additional SSL verification

if ($_SERVER['REQUEST_METHOD'] === 'POST') {
    curl_setopt($ch, CURLOPT_POSTFIELDS, http_build_query($_POST));
}

// Execute the cURL session and store the content in $urlContent
$urlContent = curl_exec($ch);

// Check for errors
if (curl_errno($ch)) {
    // Log error information
    $error_msg = curl_error($ch);
    file_put_contents('curl_errors.log', date('Y-m-d H:i:s') . " - " . $error_msg . "\n", FILE_APPEND);
} else {
    $info = curl_getinfo($ch);

    // Set the Content-Type header
    header('Content-Type: ' . $info['content_type']);

    // Filter and set the Location header if it exists
    $locationHeader = array_filter($headers, function($line) {
        return preg_match('/location/i', $line);
    });

    $locationHeader = array_values($locationHeader);
    $locationHeader = @$locationHeader[0];

    if ($locationHeader) {
        header($locationHeader);
    }

    // Output the content
    echo $urlContent;
}

// Close the cURL session
curl_close($ch);
.htaccess
RewriteEngine On
RewriteCond %{REQUEST_URI} !^/\.well\-known/?.*
RewriteCond %{REQUEST_FILENAME} !-f
RewriteCond %{REQUEST_FILENAME} !-d
RewriteRule ^.*$ /index.php [L,QSA]