How to integration Quick Code with Wordpress or any other Content Management System
In order to give customers freedom of design choices, and a better content management options, we have built an option that makes the whole script behave in dashboard consolidation mode, and when enabled, the whole frontend would be disabled.
And this is how this works:
- Host Quick Code on a subdomain, let's say app.yourdomain.com.
- Host wordpress or any CMS on the main domain yourdomain.com.
- Configure Quick Code to redirect to the main domain, or disable all frontend links.
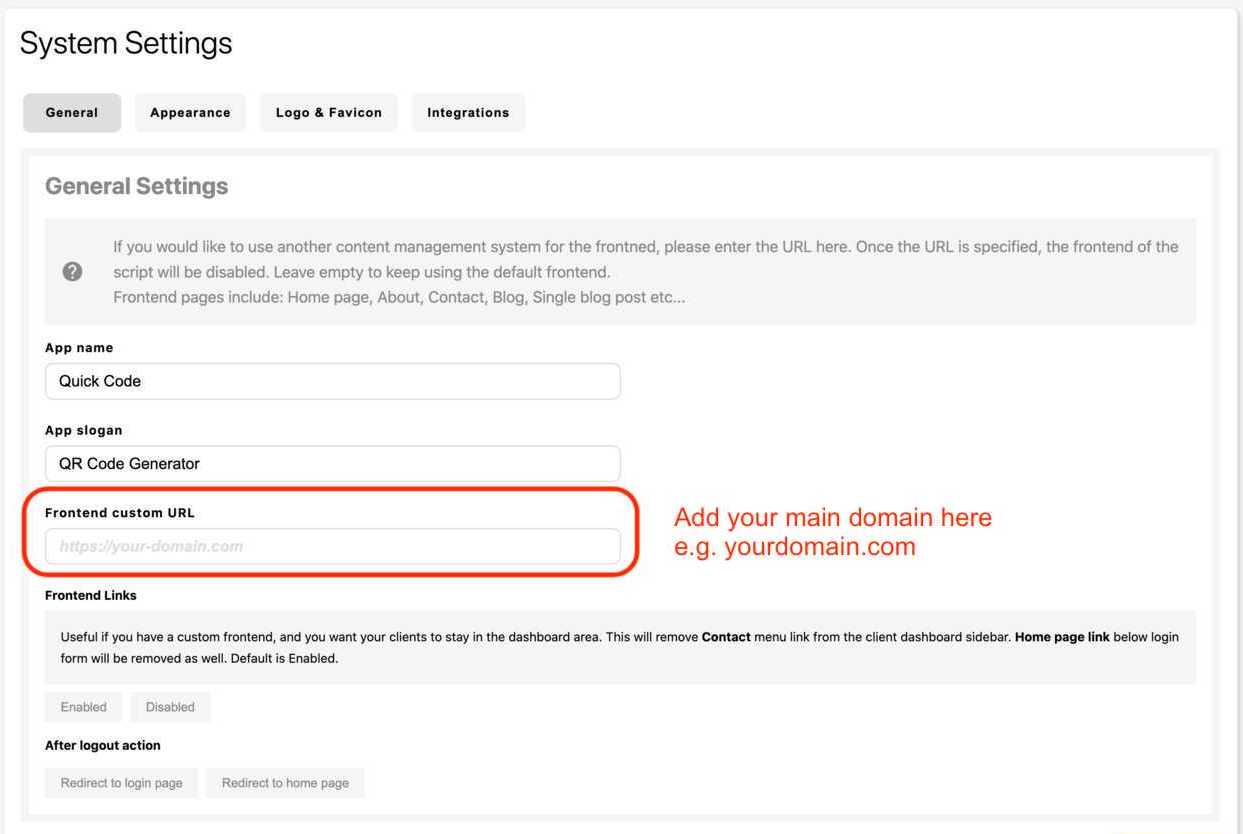
Option 1 - Custom Frontend URL
Open System > Settings page from the dashboard sidebar. In General tab you will find the option to add a custom frontend URL, add your main domain there.
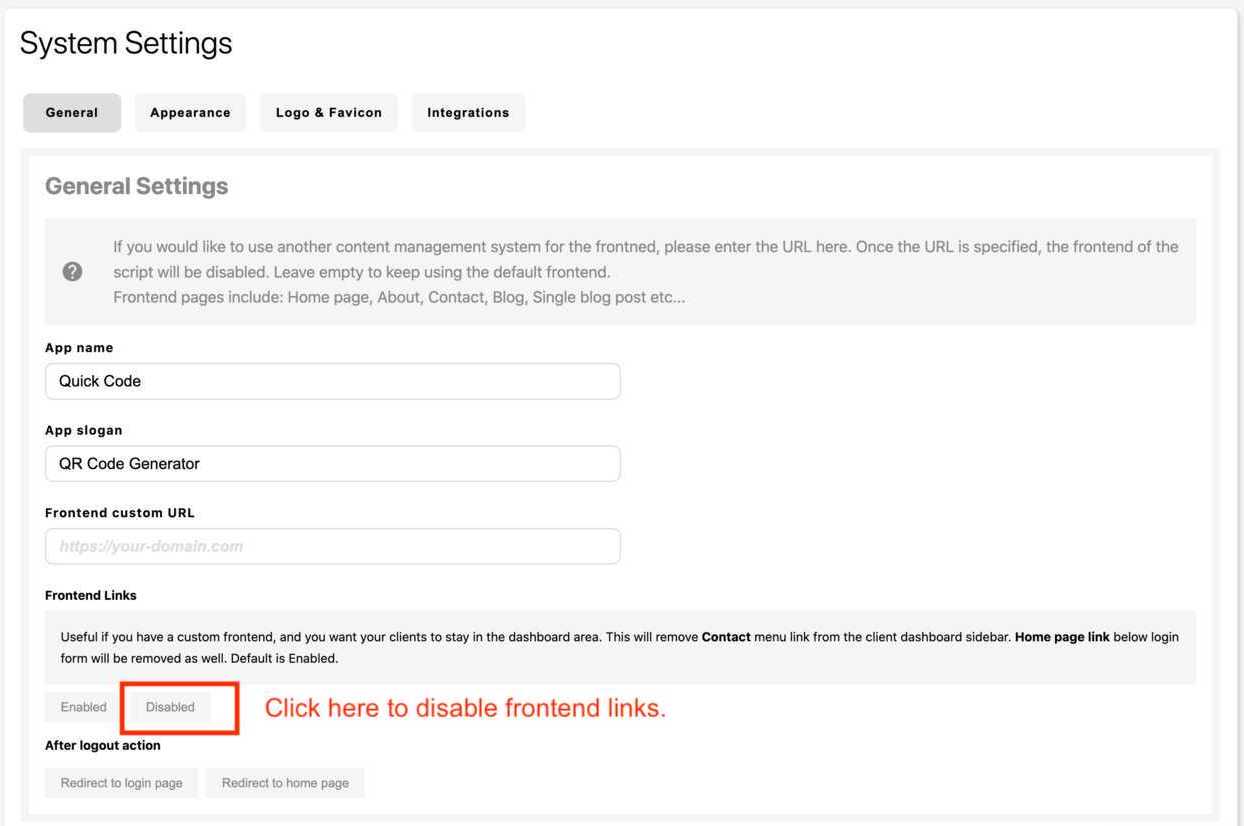
Option 2 - Disable Frontend Links
The client dashboard has a link to contact page /contact and the dashboard logo when click would redirect to the frontend home page (either custom frontend or default one). To disable this behavior, open System > Settings page and from the General tab you would find the frontend links input, click on Disabled and save the form.
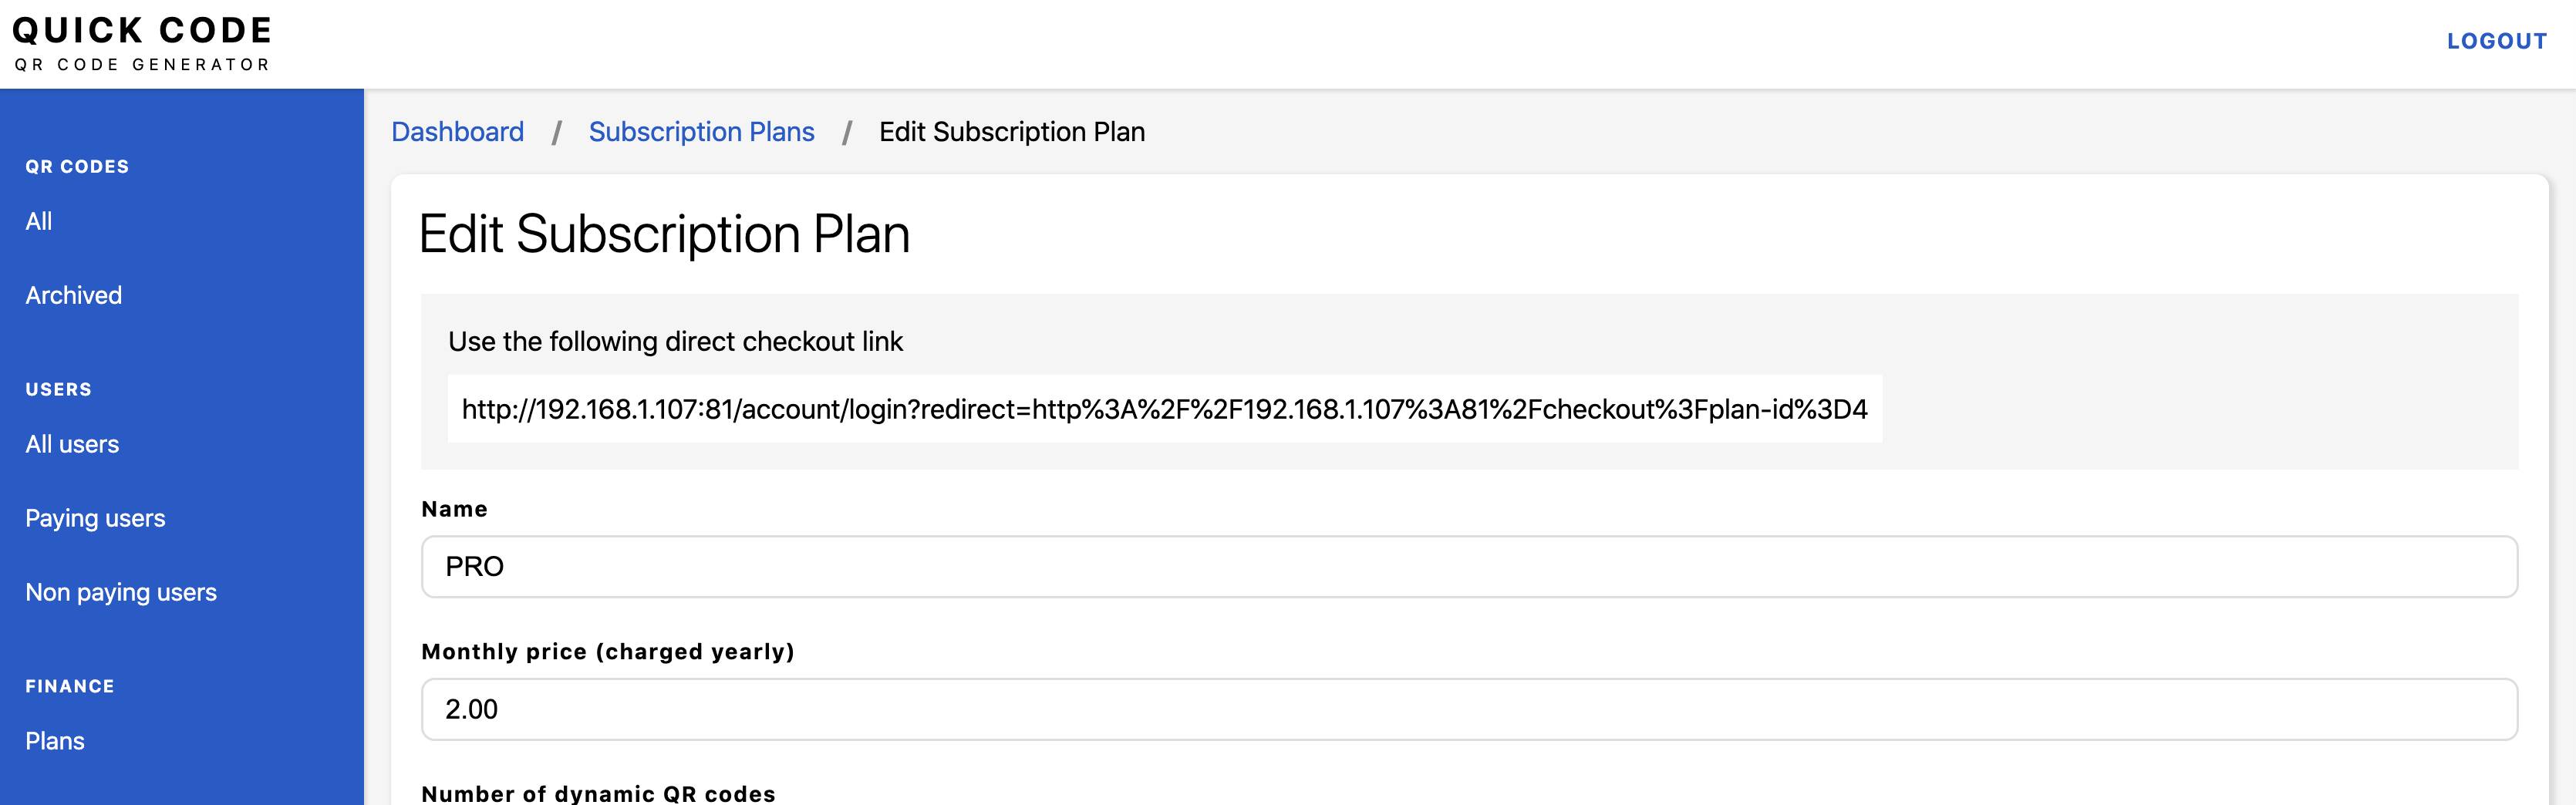
Adding plans direct checkout links (buy buttons) to your website
When custom frontend end is enabled, you can use direct checkout links which are available in each plan form.
- Go to Dashboard > Plans.
- Click on Edit link next to any plan.
- At the top of the page, you should see the direct checkout link, copy the link and use it in your website as links to buy buttons.
Add your custom pricing table link to the script
New customers on trial plans see an upgrade button in the dashboard sidebar at the bottom left of the screen. This upgrade button points to the default pricing table page in the script. It is possible to change this link by following the steps below:
- Go to System > Settings > General.
- Scroll down to the Frontend Settings section.
- Add your page full URL in the Pricing plans page URL text field.